What a VPN app needs on macOS
A VPN app is not like a text editor. It adds a VPN configuration to macOS, and macOS asks you once whether that is allowed. Until you say yes, the app cannot connect. This is the step most people miss, and where you say yes depends on your macOS version.
Teal VPN runs on macOS 13.3 Ventura or later, so also on macOS 14 Sonoma, macOS 15 Sequoia and newer. It is made for Apple silicon Macs (M1, M2, M3, M4): MacBook Air, MacBook Pro, iMac, Mac mini and Mac Studio. The download is a universal app that also contains an Intel build; support for Intel Macs is in testing.
You also need an account. Teal Free needs no payment details and gives you 500 MB of data a day, shared by your devices, the Lithuania location and up to 2 devices. On a Mac without Apple's security chip (some older Intel Macs), Teal Free also needs Teal VPN on your Android phone. Teal Pro doesn't: it has unlimited data, every Teal VPN location and up to 3 devices. Monthly and yearly plans start with 7 days free, with a card on account.tealvpn.com, and you pay nothing if you cancel before day 7.
| macOS version | Where you allow the VPN configuration |
|---|---|
| macOS 13 Ventura, macOS 14 Sonoma | System Settings › Privacy & Security › Allow |
| macOS 15 Sequoia and later | System Settings › General › Login Items & Extensions › Network Extensions |
Install Teal VPN
The Mac app is a direct download from tealvpn.com/mac, signed and notarised through Apple's Developer ID process. It is not on the Mac App Store yet. The app updates itself, so you do this once.
Download the .dmg
Open tealvpn.com/mac on the Mac and download the .dmg file.
Drag the app to Applications
Double-click the .dmg and drag Teal VPN onto the Applications folder.
Eject and open from Applications
Eject the disk image. Open Teal VPN from the Applications folder, not from the disk image. An app started from the .dmg cannot keep its VPN configuration.
Sign in
Sign in with Google, or with your email: Teal VPN sends a code to your email and you type it in. There is no Apple sign-in in the direct Mac build. Teal Free (500 MB a day) asks for no payment details.
Connect the first time
The first Connect is the one that needs your permission. Every connect after that is one click.
To check that it worked, open System Settings › VPN. Teal VPN is listed there.
Press Connect
In the Teal VPN window, press Connect.
Allow Teal VPN
macOS asks whether Teal VPN may add a VPN configuration. Allow Teal VPN, then allow the VPN configuration with Touch ID or your password.
If Connect never finishes
On macOS 13 and 14, go to System Settings › Privacy & Security and press Allow next to Teal VPN. On macOS 15 and later, go to System Settings › General › Login Items & Extensions › Network Extensions and turn Teal VPN on.
Go back to the app
Return to Teal VPN. It connects. From now on, one click connects.
The menu bar window and the Fastest location
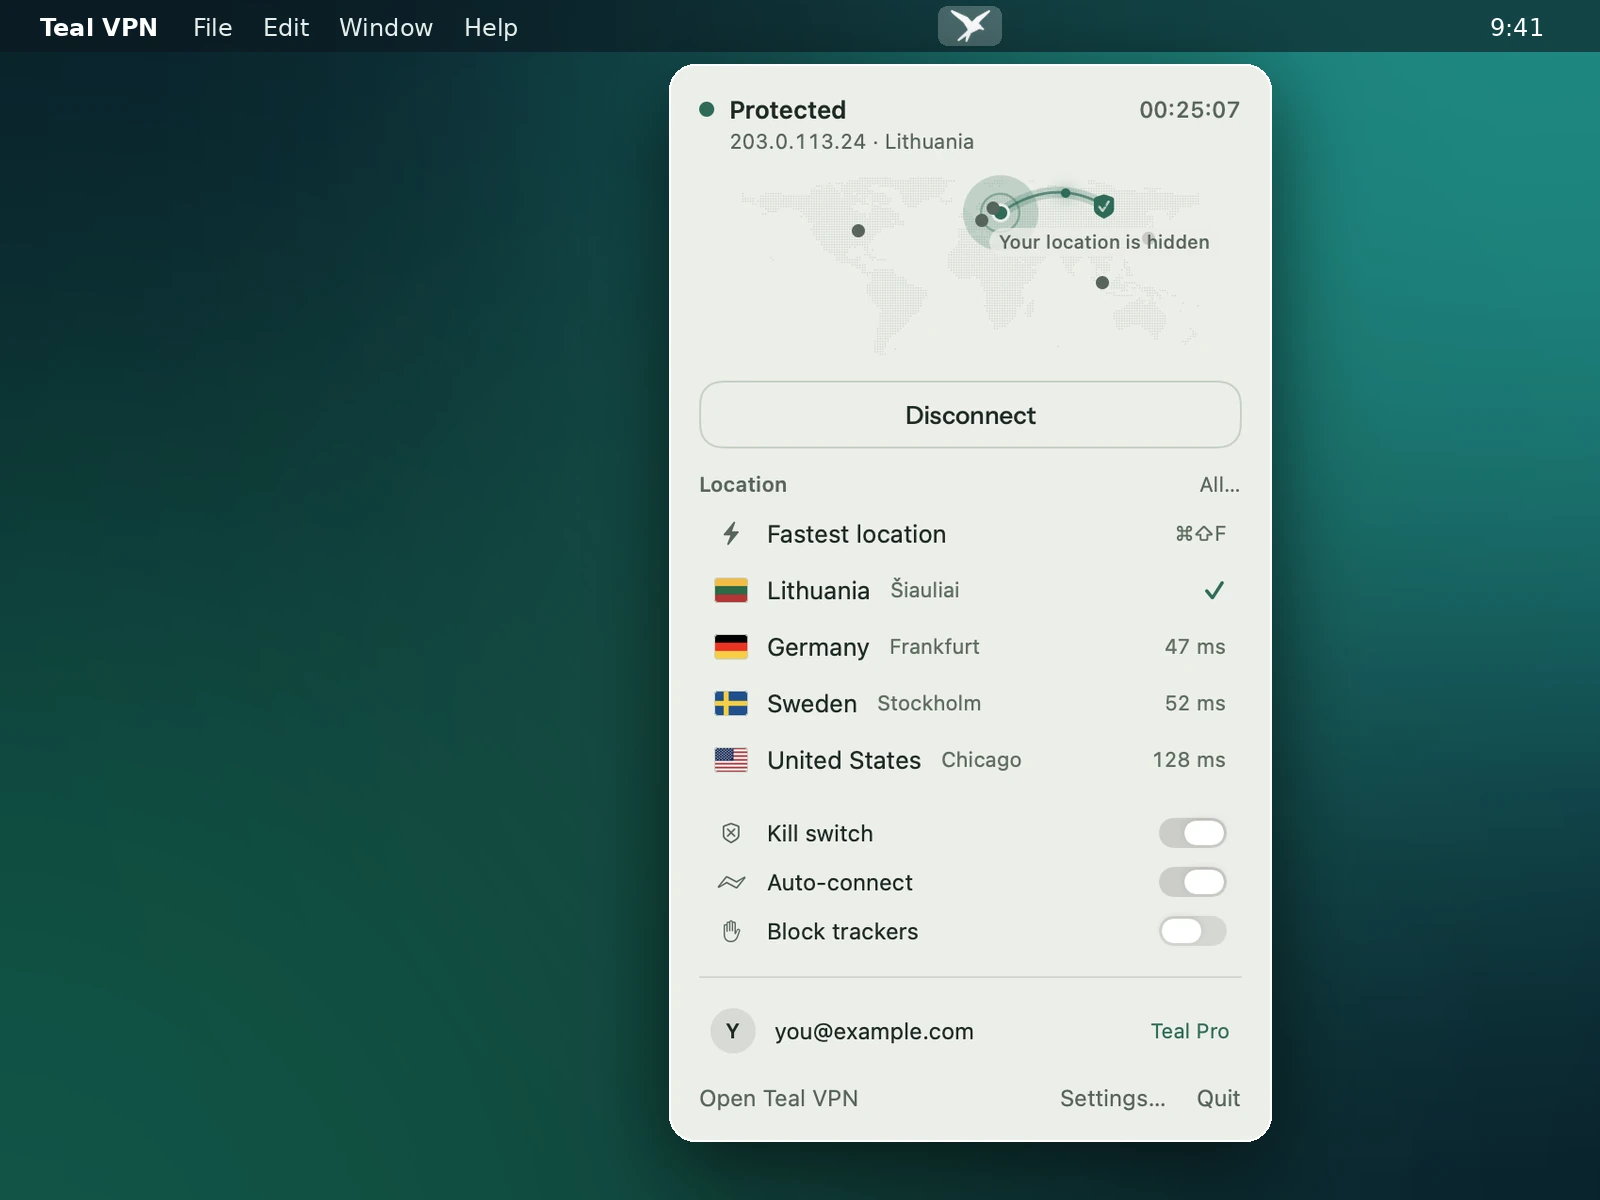
Teal VPN lives in the menu bar. Click the icon and a small window opens: connect or disconnect, choose a location, see Data today. You can hide the Dock icon and use the app from the menu bar only, keyboard included. There is also a full window with the map, your IP address, ping and speed, in light or dark mode.
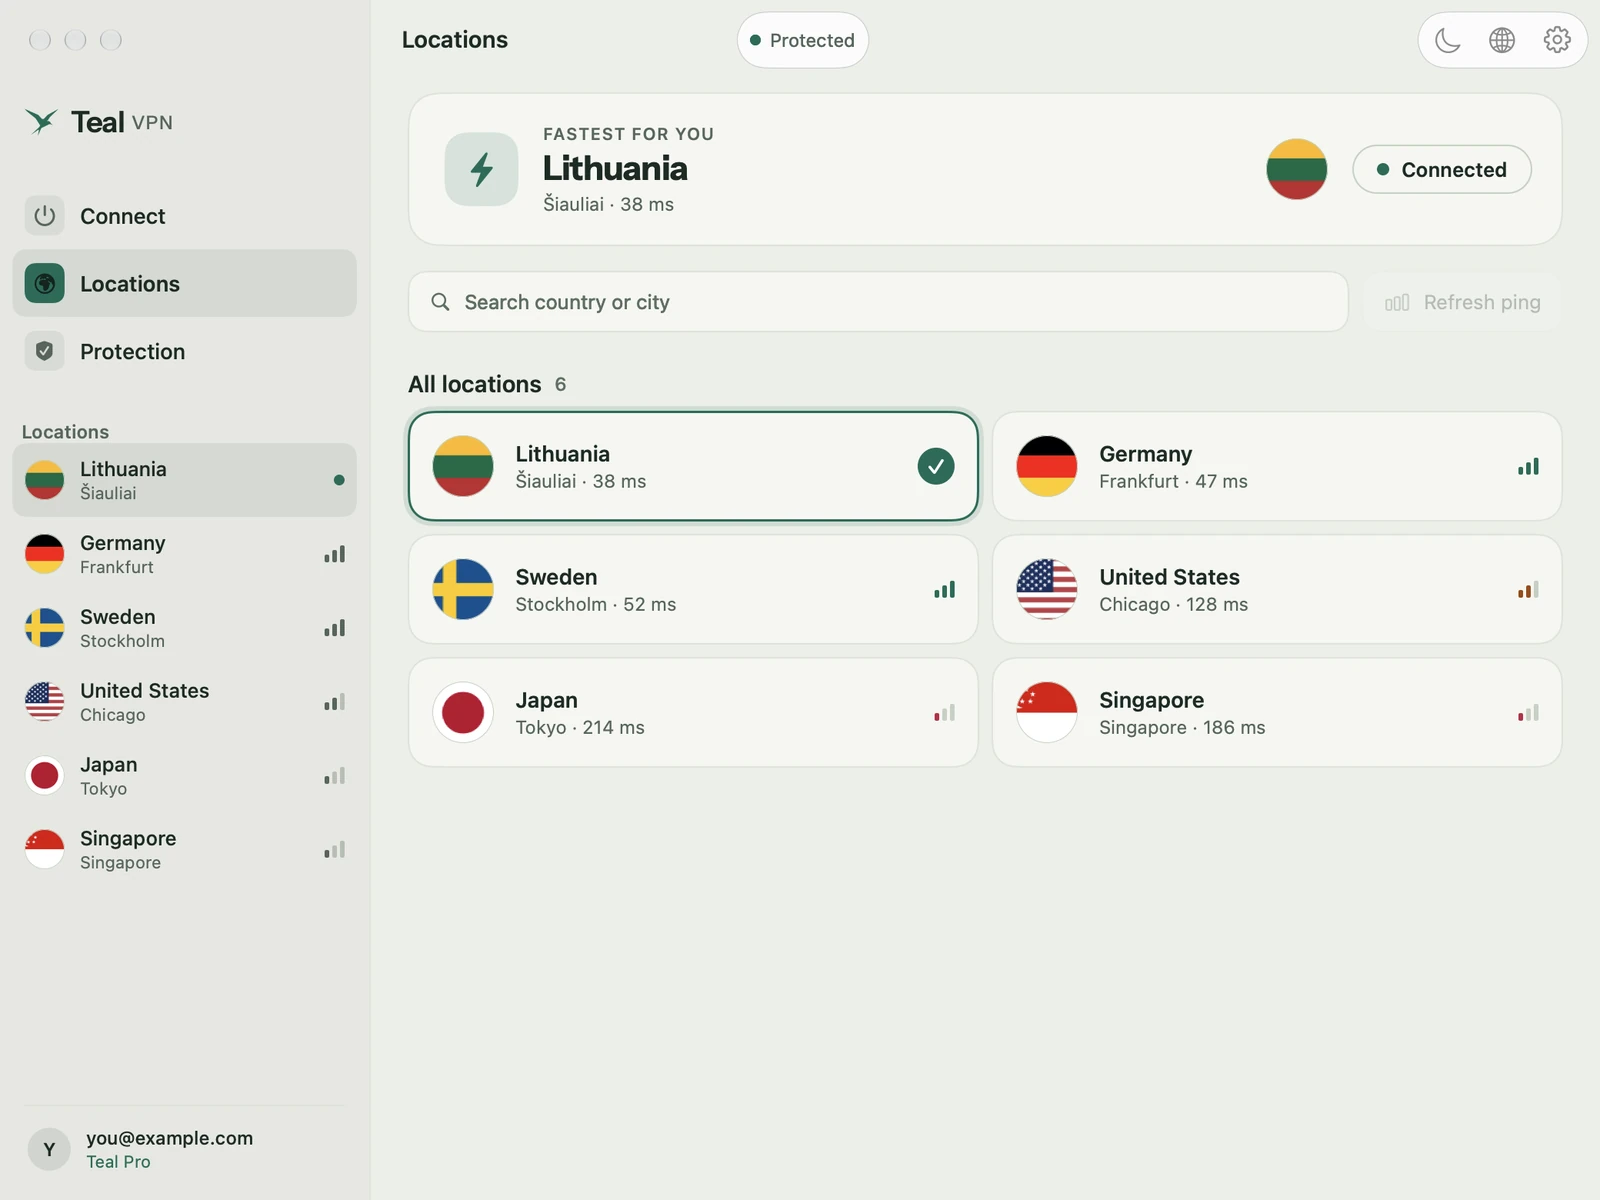
On the Locations page, Teal VPN measures your ping to each location and puts the fastest at the top. Choose Fastest when you just want a quick connection. On Teal Free (500 MB a day) the location is Lithuania. Teal Pro has every Teal VPN location, in Europe, North America, Asia and Australia; the list is on tealvpn.com/locations.
If one route fails, Teal VPN switches to another by itself.
Kill switch, auto-connect and connect on demand
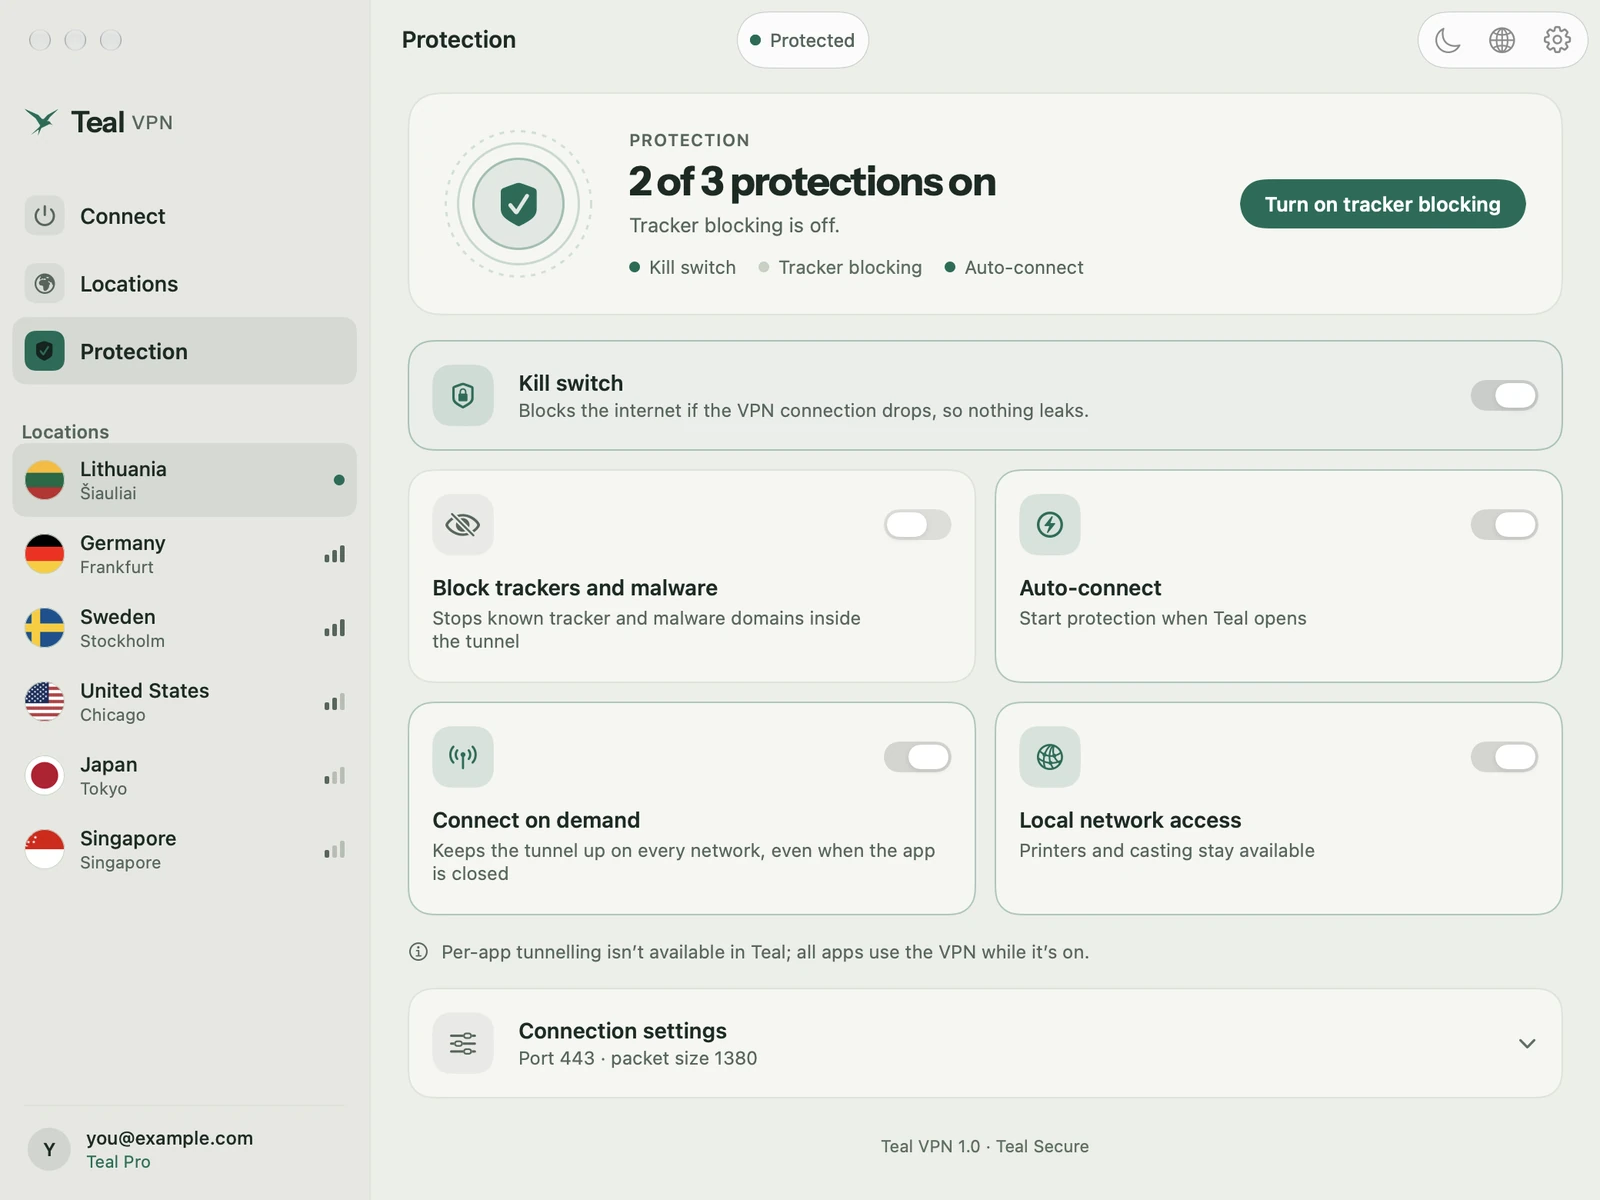
These switches are on the Protection page, next to tracker and malware blocking and Apps outside the VPN, a list for apps that should skip the VPN.
A VPN does not hide who you are: accounts you sign into still know it's you. It does not make a fake sign-in page safe, remove malware, or fix a network with no internet.
Turn on the kill switch
The kill switch stops the internet if the VPN drops, so nothing leaves the Mac outside the tunnel.
Turn on auto-connect at login
Teal VPN starts and connects when you log in to the Mac.
Turn on connect on demand
Connect on demand keeps the tunnel up on every network, so the VPN comes back by itself when the Mac changes Wi-Fi.
When it does not connect
Most Mac problems are one of the cases below. Check them in order.
If it still fails, write to [email protected] with your macOS version, the Teal VPN version, the location you chose, the exact message, and whether a phone hotspot works. Never send passwords, codes or keys.
| What you see | What to do |
|---|---|
| Connect never finishes | Allow the VPN configuration in System Settings (paths above). |
| The VPN setting keeps disappearing | You opened the app from the .dmg. Eject it and start the copy in Applications. |
| Not protected, another VPN is active | Only one VPN app can carry traffic. Quit the other one fully, from its menu bar icon too. |
| Hotel, airport or café Wi-Fi | Finish the network's sign-in page in a browser first. |
| Wi-Fi fails, phone hotspot works | The Wi-Fi filters VPN traffic. Teal VPN tries another route by itself. |
| No data on Teal Free | Check Data today. A spent 500 MB a day is not a blocked network; it resets daily. |
| Nothing works, even after a restart | Check the Mac's date and time. A third-party firewall such as Little Snitch can block the app. |
The built-in macOS VPN settings
macOS has its own VPN settings under System Settings › VPN. They are for a VPN that someone gives you, usually an employer or a school: you get a server address and sign-in details, add the configuration by hand and connect from the same place.
A consumer VPN app sets this up for you because there is no server address to type. Teal VPN picks the server, creates the configuration and switches to another route if one fails. It needs the same macOS permission, which is why it appears under System Settings › VPN after the first connect.
On privacy: we do not log the websites you visit, your DNS lookups or the contents of your traffic, and we do not store the IP address you connect from. What we keep and what we don't is on tealvpn.com/transparency.
How to remove the app
Removing Teal VPN takes a minute. Sign-in and settings are kept in the account, so the same account works on Android, Android TV, Chromebook, Windows, Mac and Linux, or on this Mac again after a fresh download.
Disconnect and quit
Press Disconnect, then quit Teal VPN from its menu bar icon.
Delete the app
Open the Applications folder, move Teal VPN to the Trash and empty the Trash.
Keep reading
References
- Apple Support: Set up a VPN connection on Mac
- Apple Support: Change Login Items & Extensions settings on Mac
- Teal VPN for Mac
- Teal VPN transparency: what we keep and what we don't
Need help with Teal? Contact support.